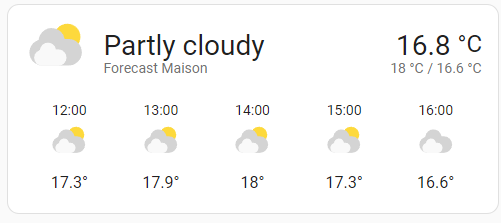
At home I rarely walk around with my phone in the hand. In order to get information from Home Assistant I have a wall mounted tablet in the bathroom, and a Google Nest Home in the corridor that I pass through to get to the various rooms in the house. One information I like getting is the weather forecast for the next few hours.
There are many weather forecast cards in Home Assistant. When I started looking for one that would suit my needs I started by making a list:
- Forecast by YR.no, that I find the most reliable.
- Large icons, so that I don’t have to put on my glasses to see.
- Hour by hour, without current condition displayed (I can look out the window for that).
- Possibilty to choose: information displayed, font-size and layout.
After numerous days looking for such a card I had to admit that such a card does not exist. In my younger days I did a lot of programming in php and Pascal, but did not really have the courage to start learning a new programming language just to make a card that suits my needs.
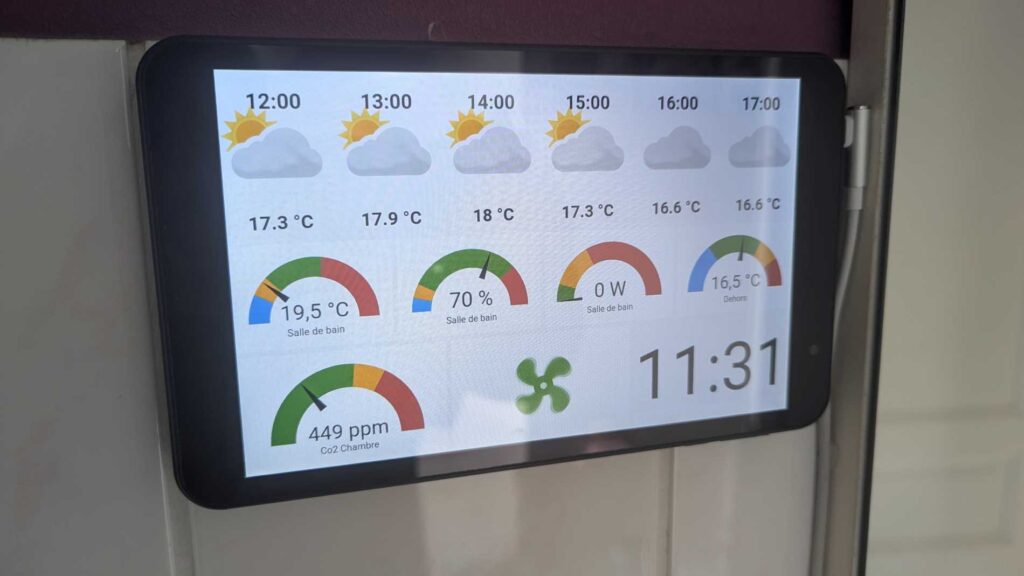
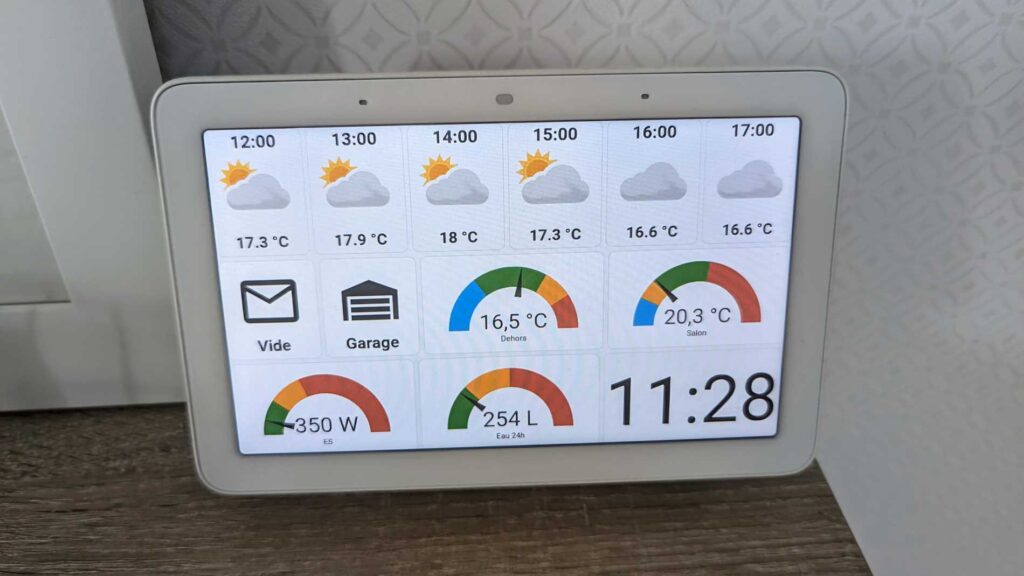
I did, however, manage to come up with a solution that works for me, and I now have 2 dashboards that suits my needs:
Android tablet in the bathroom:
Google Nest Home in the corridor:
This is how I did it:
On my Proxmox server I installed ioBroker in an LXC-container, and installed the MQTT Client and YR.NO adapters. The advantage of this solution is that ioBroker can publish values from one adapter (YR in this case) to an MQTT-server, and the YR-adapter has e.g. the name of the icon corresponding to the forecast (both day and night versions).
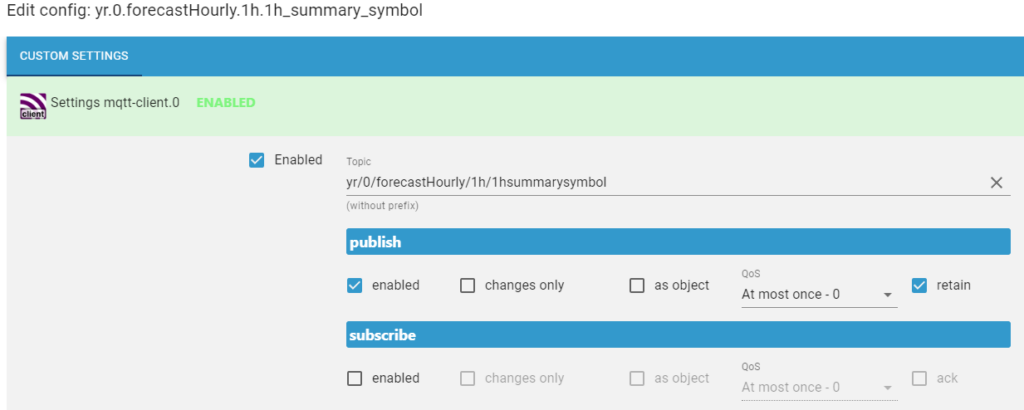
ioBroker has some integrations (adapters) not available in Home Assistant, or just better than the HA integration (ex. for my Worx lawn-mower).
In Home Assistant I defined the sensors to read the data from ioBroker. I used 1 set of sensors for each hour that I wanted:
mqtt:
  sensor:
    # from iobroker YR.no

    # hour h0

    - name: "Forecast YR 0h symbol"
      unique_id: "forecastHourly_0h_1hsummarysymbol"
      icon: mdi:sun-thermometer-outline
      state_topic: "yr/0/forecastHourly/0h/1hsummarysymbol"
      qos: 0

    - name: "Forecast YR 0h airtemperature"
      device_class: temperature
      unique_id: "forecastHourly_0h_airtemperature"
      state_topic: "yr/0/forecastHourly/0h/airtemperature"
      unit_of_measurement: "°C"
      state_class: measurement
      qos: 0

    - name: "Forecast YR 0h timestamp"
      unique_id: "forecastHourly_0h_timestamp"
      device_class: "timestamp"
      icon: mdi:clock-time-eight-outline
      state_topic: "yr/0/forecastHourly/0h/time"
      value_template: "{{ ( value | int  / 1000 ) | timestamp_local }}"
      qos: 0
I downloaded the icons, and placed them on the Home Assistant server under www/adapter/yr/icons/
For the symbol I defined a template sensor helper:
http://IP_OF_SERVER/local{{ states('sensor.forecast_yr_0h_symbol') }}Note that I have a public domain name for my server, so I used that instead of IP.
For each icon I created a Custom Button Card:
- type: custom:button-card
entity: forecast_hour0_temperature
name: >
  [[[

  return ''+
  states['sensor.forecast_hour1_timestamp_template'].state
  +''

  ]]]
label: >
  [[[

  return ''+
  states['sensor.forecast_hour1_temperature_template'].state
  +''

  ]]]
show_label: true
styles:
  card:
    - background-color: transparent
    - height: 220px
    - background: >
        [[[

        return 'url('+
        states['sensor.url_yr_1h_symbol'].state +')'

        ]]]
    - background-size: cover
    - background-size: 130px 130px
    - background-position: center
    - background-repeat: no-repeat
  grid:
    - grid-template-areas: '"n n n" "n n n" "l l l"'
  name:
    - font-weight: bold
    - font-size: 30px
    - color: black
    - align-self: middle
    - justify-self: null
    - padding-bottom: 140px
  label:
    - font-weight: bold
    - font-size: 28px
    - color: black
    - align-self: middle
    - justify-self: null
    - padding-bottom: 0px
I repeated this for each hour I wanted on the dashboard.
